
Tips
-
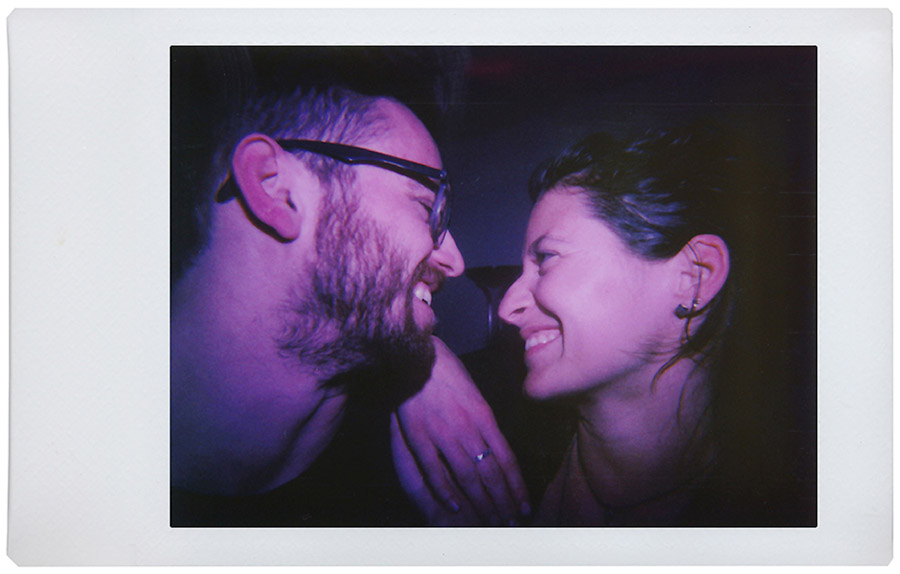
Colorsplash Tip 1
The Colorsplash Attack!
Everyone wants to add that extra little bit of color to their lives…and with the Lomo’Instant you can! By using the color gels which come with your camera, when shooting with the flash on, you can splash and soak the foreground of your instant snaps in all kinds of wonderful tones. Pour some purple onto your friends, bring some blue into your Lomo’Instant life, rinse your next instant in red or live your life drenched in luscious yellow – bring a different tone to every moment you capture!
-
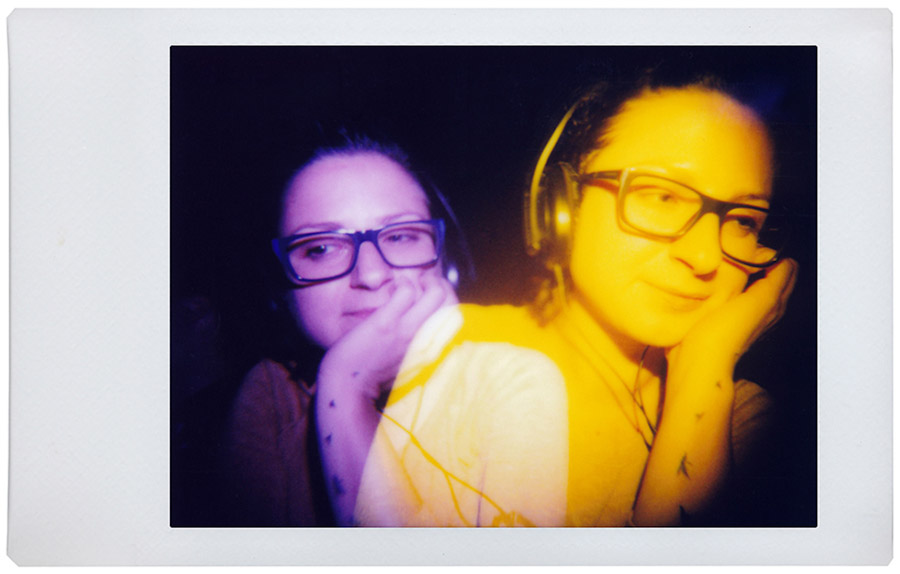
Colorsplash Tip 2
Combine Your Colors
One fun-tastic thing you can do with the color filters that come with your Lomo’Instant is to use them to mix tones using the multiple exposure function. Why not try shooting 1 photo with the red filter and then doing a multiple exposure using the yellow filter to end up with an orange soaked image? Using this technique, you can mix, match and multiply your color soaking fun by turning the world into surreal new tones.
-
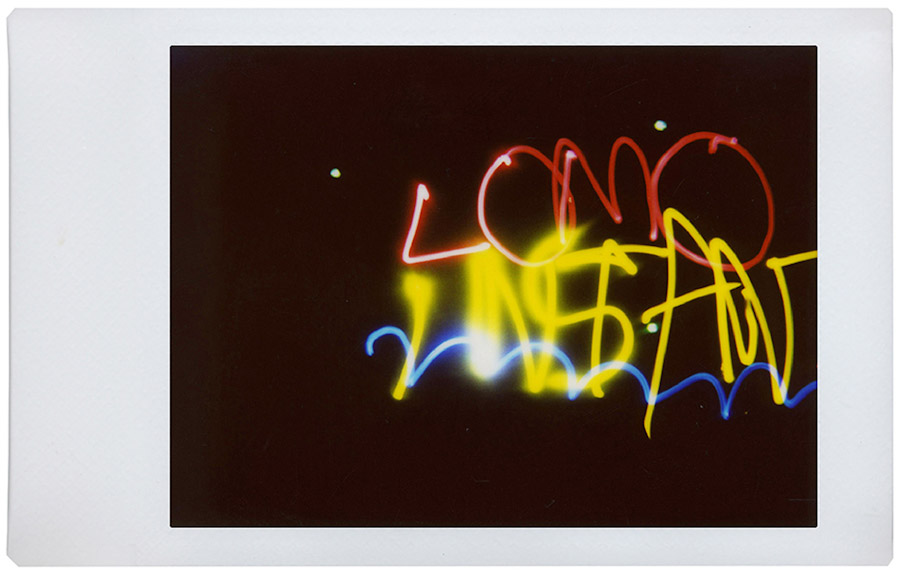
Long Exposure Tip 1
Paint with Light
Here’s one for the party people, let’s try some Lomo’Instant light painting! Flick the camera to the long exposure setting whilst in the Creative Shooting Mode and put it on a tripod. Now grab a bunch of mates, some glow sticks, torches or LED lights and a flash. Make sure the room is completely dark and hold the shutter button down. The camera will flash to begin with – after it has flashed, paint some fun shapes with the lights. When you are done, take your finger off the shutter button to finish the exposure. Woohoo, you just made your first light painting Lomo’Instant photo!
-
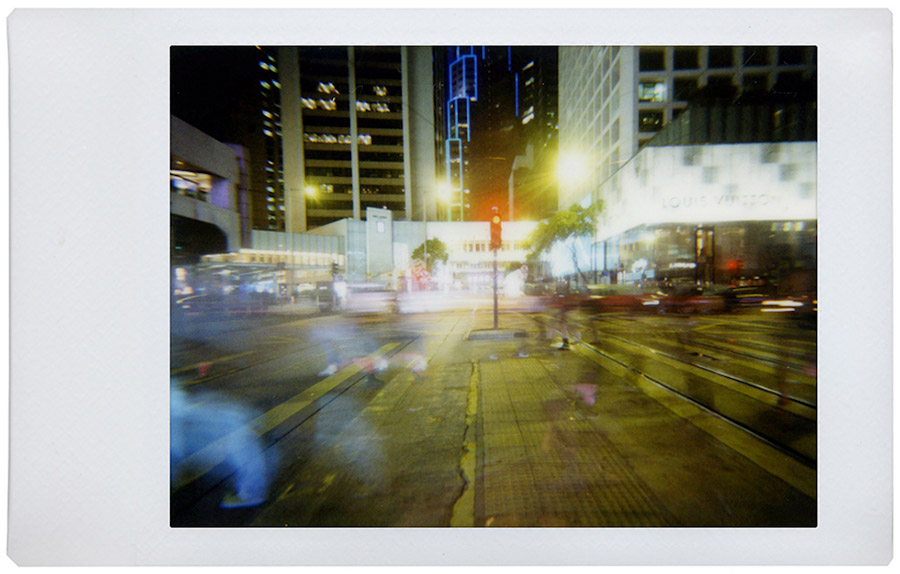
Long Exposure Tip 2
It’s Gonna Be A Long Night
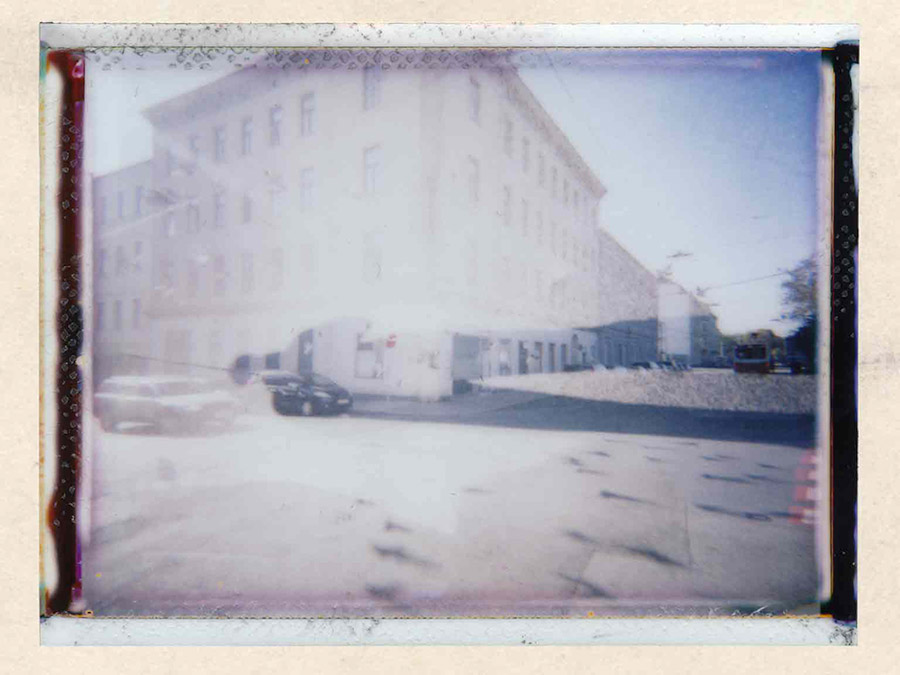
One type of Lomo’Instant photo we love to shoot is long exposure shots of busy streets at night. To do this, find a safe location where you’ll have a good view of traffic rushing past – Bridges which cross highways are good place to try. Then, simply set your camera to the B (long exposure) setting on the Creative Mode (Flash Off) and put it on a tripod (it’s also best to use a cable release if you have one). Now take your long exposure photo. Using this technique, you will get photos which are streaked with the bright lights from the traffic! And it’s not only street scenes you can use this tip for – why not also try shooting a brightly lit carousel at night, the lights of the city skyscrapers after the sun goes down or a fire-breather at the carnival?
-
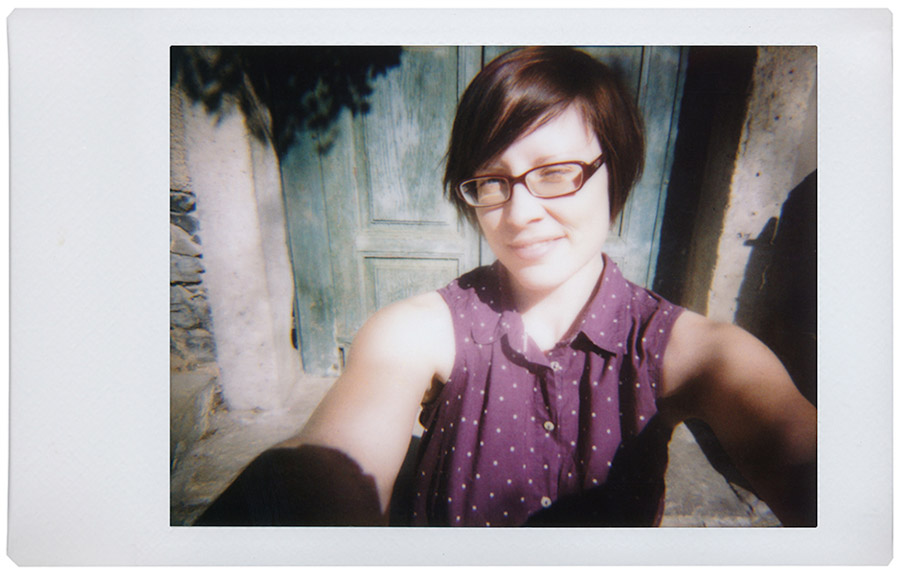
Wide-Angle Tip 1
See The World In Wide
Psst, here’s a useful starter secret about your Lomo’Instant for you. The built-in lens on your camera is a wide-angle lens, which means that it can capture all kinds of interesting things – in fact, it can see even more than your eyes can! So when shooting with the camera, use this newly gained knowledge to your advantage by filling your instant photos with as many interesting things as possible! For example, try shooting a self-portrait with a fantastic landscape behind you – your Lomo’Instant will be able to capture both your beauty and the beauty of your background!
-

Wide-Angle Tip 2
Squeeze It In
Since the Lomo’Instant built-in lens is wide-angle, it is totally awesome for shooting group portraits! So when you are next out partying with friends, squeeze together for the ultimate instant photo and capture the whole group in one go. And take this technique to the extreme by pressing together into confined spaces to make things even more fun – Try cramming into a toilet cubicle, tiny car or into an elevator for your fun wide-angle group instants! And shoot as close as possible to really get the most out of the wide-angle effect!
-
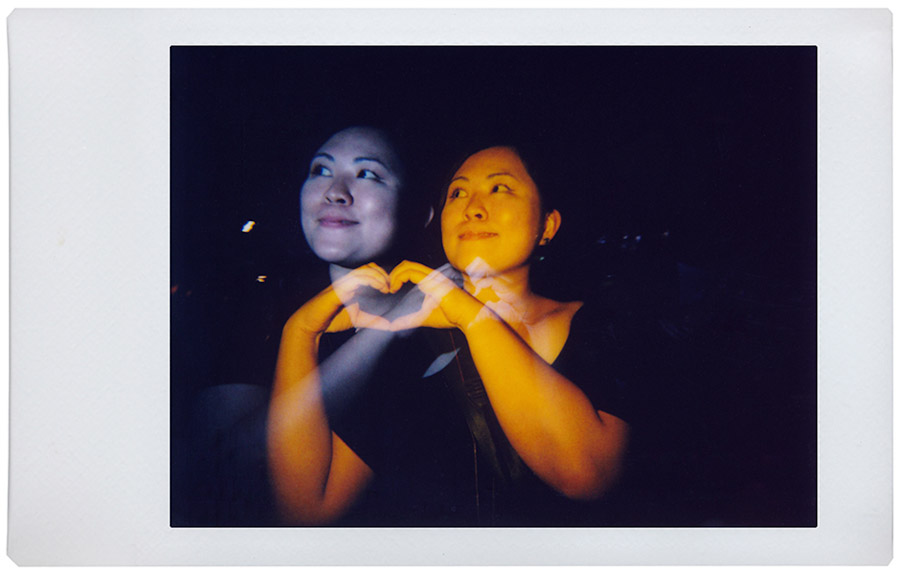
Multiple Exposure Tip 1
Meet My Doppelganger
Ever wanted to double yourself in an instant? Here’s a way to do it without even using your magic wand. Set your Lomo’Instant on a tripod and switch off the lights. Then set your camera to the MX (Multiple exposure mode). Now get a friend to take a flash photo of you. Then move a little and tell them to shoot again. When you are done with shooting, move the MX back and your photo will eject. You’ll end up with an instant photo where you are shown twice (Extra Tip - this looks even cooler when you flash with two different colors!).
-
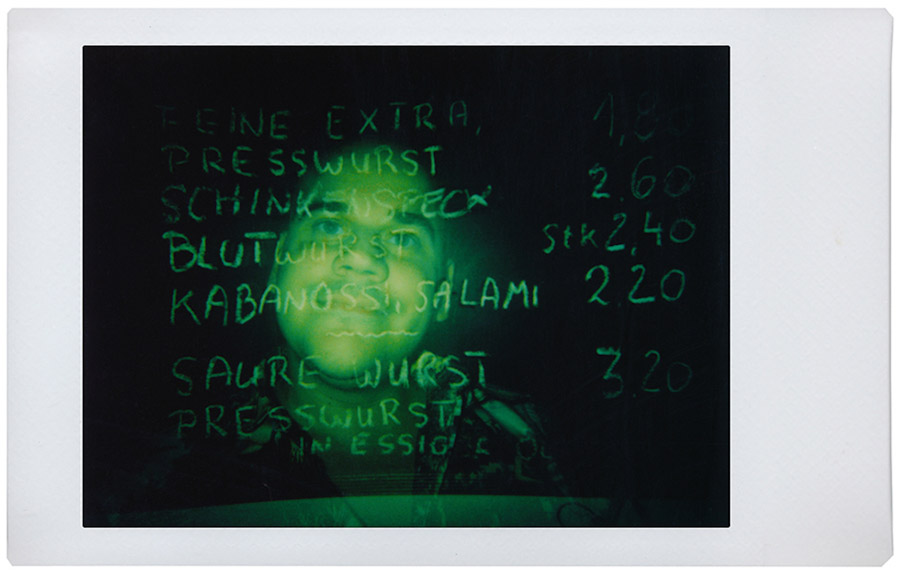
Multiple Exposure Tip 2
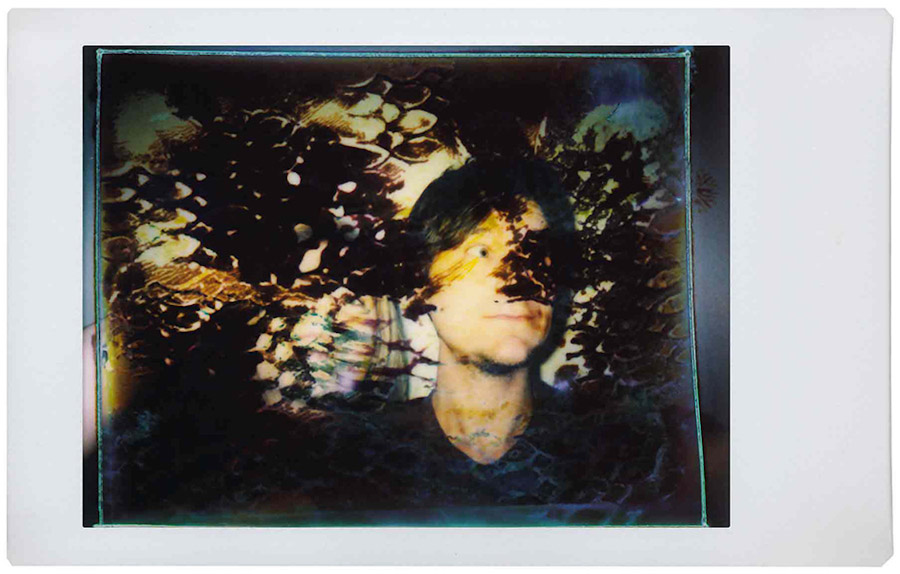
Pattern Paradise Portraits
Multiple exposure photos look fantastic when you mix together a portrait and a crazy, patterned background. So go out on a Lomo’Instant shooting trip and keep your eye open for interesting patterns in the world such as bright graffiti on a wall, the textures of trees and interesting, patterned clothes. Now flip the MX switch and shoot a photo of one of these things. Then take a self-portrait and move the MX switch back — you’ll end up with a photo where you and the pattern are combined!
Flash Photography Tip
-
The Lomo’Instant features a clever little built-in flash which is capable of illuminating your instant shots. Here are some tips for getting the very best possible flash photos:
- When you are shooting on the 0.4m-0.9m focusing distance, the flash sensor calculates how strong it needs to flash to avoid overexposed photos. If you are shooting at this focusing distance, it’s best to have a clear path to your photographic subject. Since if you shoot a photo with 2 objects within the 0.4-0.9m range, the flash will calculate its strength according to the closest object to you. When shooting at the 1m-Infinity focusing range, the flash will always shoot at its full power.
- If you’d like to get a bit more creative with your flash photography, we recommend shooting with the Creative Mode (Flash On) and setting the shutter to B (long exposure) mode. This is especially useful when shooting in darker environments where you need to allow a bit more light into your shots. Using this mode, the flash will fire at the start of your exposure and then you should keep the shutter open for 1-2 seconds. This is also a fun technique when you are shooting with lights in the background, since then you will get light-streaked backgrounds in your photos.
- If using the above method results in shots which are still a little underexposed, you can try holding the shutter open for a bit longer or by setting the exposure compensation dial to +1 to increase the exposure of the image further.
-
It is also important to note that like all cameras with a built-in flash, the flash on the Lomo’Instant is only able to illuminate subjects up to a certain distance. When shooting on the Auto mode, the effective flash distance will be approximately 1.4m-1.8m. If you would like to shoot objects more than 1.8m away, we recommend switching to the Creative Mode (Flash On) and adjusting the exposure compensation dial. Here is a table to help calculate what exposure compensation you need depending on your distance to your subject:
- Flash Distance 2.8m - 3.5m = Use +2 Exposure Compensation (f/8 aperture)
- Flash Distance 2.0m - 2.4m = Use +1 Exposure Compensation (f/11 aperture)
- Flash Distance 1.4m - 1.8m = Use Auto Mode (Default Aperture f/16)
- Flash Distance 1m - 1.3m = Use -1 Exposure Compensation (f/22 aperture)
- Flash Distance 0.7m – 0.9m = Use -2 Exposure Compensation (f/32 aperture)
Special Lens Tips
-

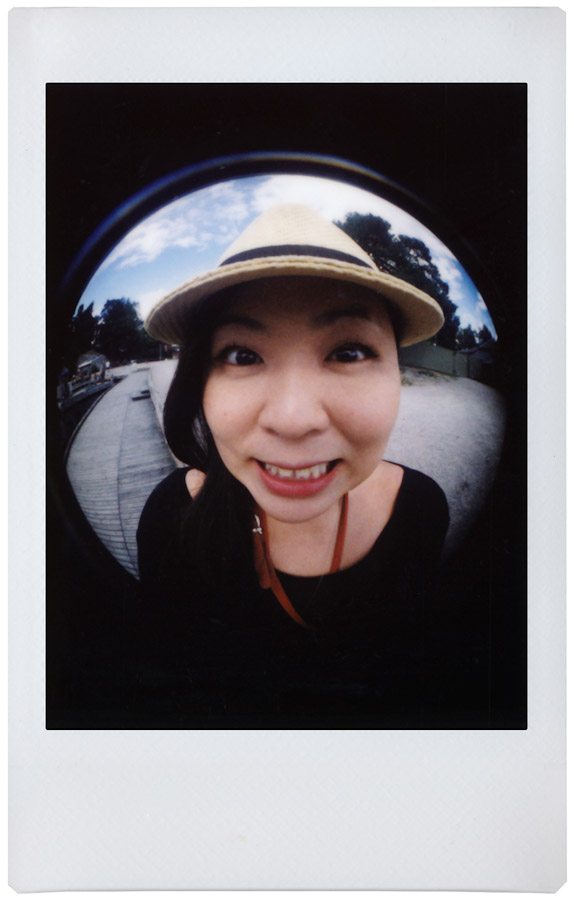
Fisheye Lens Tip 1
Hey Big Mouth, Hey Huge Nose
With the Lomo’Instant Fisheye Lens Attachment you can shoot instants in tons of new, inventive ways. The Fisheye squeezes the world into a 170° circle and exaggerates the shapes of objects and people. A perfect example of this is when you shoot close-up photos of people’s faces, especially inside their mouths and right up near their noses! Give it a try to get crazy and funny Lomo’Instant photos of your friends!
-
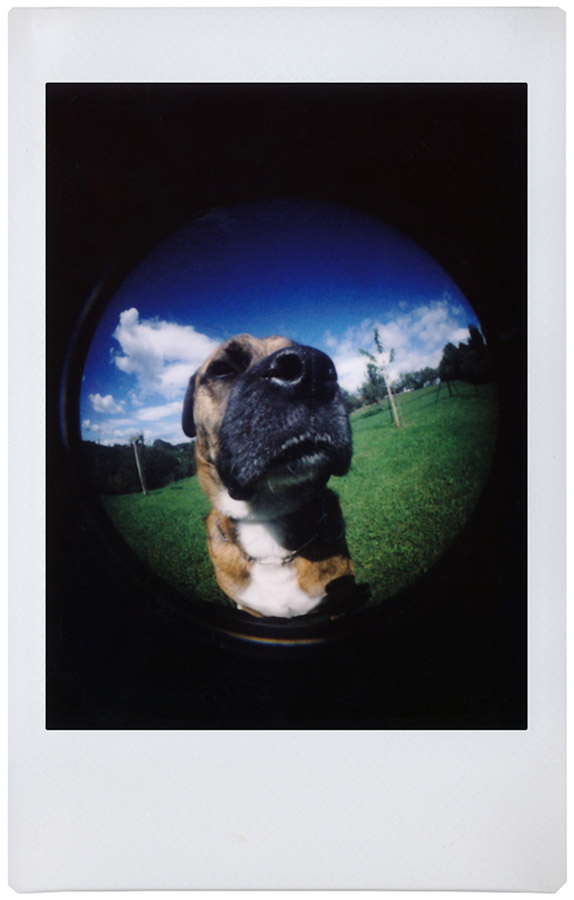
Fisheye Lens Tip 2
Animals Love Fisheye!
Try shooting Lomo’Instant Fisheye photos of your pets and the animals you see on your photographic travels. The lens will distort and amplify the features of animals and we promise you’ll get some very funny instant photos to laugh about for years to come! Don’t forget to get close when shooting with the Fisheye lens for the biggest impact shots!
-
Fisheye Lens Tip 3
Avoid Lens Shadow
When using the Fisheye lens on your Lomo’Instant, you may get a shadow cast on your image when shooting in the flash modes. This is a common issue when shooting with a wide-angle lens on cameras with a built-in flash. There are a couple of things you can do to help avoid this. Firstly, try shooting in one of the flash off modes and with the camera on a tripod in Bulb (long exposure) mode. Alternatively, use the Fisheye lens attachment when shooting outside in sunny conditions, since then you won’t need to use the flash and can still shoot using the N (normal) setting; this is sure to produce outstanding results!
-
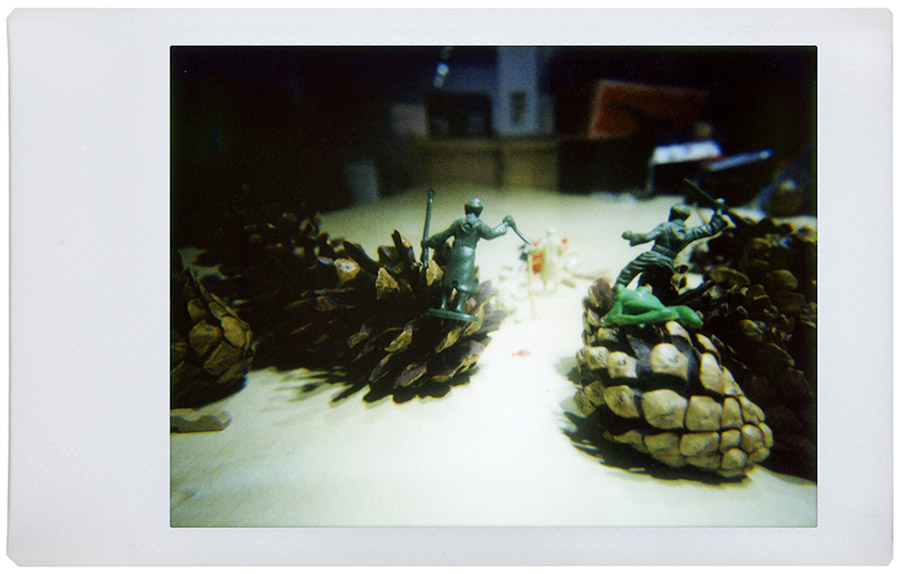
Close-Up Lens Tip
Create a Mini Close-Up World
The Lomo’Instant Close-up Lens opens up all kinds of extra shooting possibilities for you to play with. With the lens attached to the built-in Lomo’Instant lens, you can shoot fantastic instant photos between 10cm and 15cm from your subject. One cool instant project to try is to shoot close-up photos of mini figurines to create interesting, surreal and other-worldly photo stories. Give it a go!
-
Portrait Lens Tip
Perfect Portraits
The Lomo’Instant portrait lens attachment is perfect for portrait shooting. Whilst the built-in lens of the Lomo’Instant is wide-angle, the Portrait lens has a standard equivalent focal length. This makes it great for shooting portraits where you want your photographic muse to remain the center of attention. Of course however, you can use the Portrait Lens Attachment for other types of shots such as landscape photos and it will still work like a charm!
Crazily Creative Tips
-
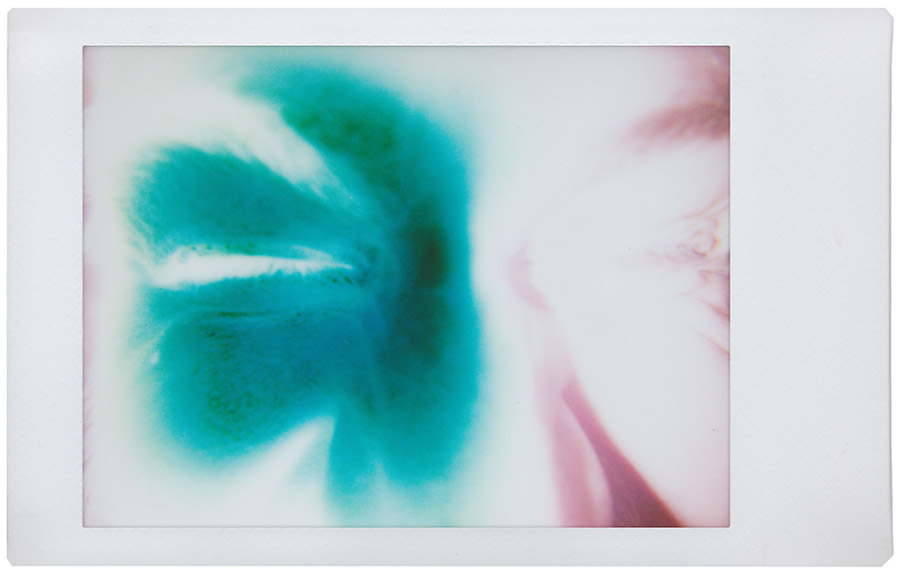
Super Flash Solarizations
Toss out the rule book, grab your close up lens and get up close and personal with your Lomo’Instant. Learn how to make some seriously cool inverted shots and wow your friends!
Read the Tipster→ -
Peel Effect Frames
Bored with the usual white frame on your Lomo’Instants? You can change that, and with a minimum amount of effort. Do it with this hip tipster!
Read the Tipster→ -

Dreamy Lomo’Instant-grams
Interested in trying out some early photography tricks from back in the day? Visit the dark side (or at least a dark room) to make these creative shots with your Lomo’Instant!
Read the Tipster→ -
Chemical Manipulations
Make sure you put on some protective gloves for this experimental chemical tipster. Play the mad scientist card right here and you’ll end up with some truly unique looking Lomo’Instants.
Read the Tipster→