
1. Loading the film
To take your first shots you need to load the camera with 35mm film. This is the standard film format and can be purchased from our online shop. With a roll of 35mm film in hand, follow these instructions to load your camera properly:
- Remove the camera's back door by lifting the backdoor closures on both sides of the camera.
- Turn the sprocket gear until you see the white dot in the film-stopping reference window which is located on the top of the camera, just to the left of the viewfinder and hot-shoe.
- Pull upwards to lift the rewinding knob, insert a fresh roll of film, then push the rewinding knob back down, locking the film in place.
- You will see the take up spool on the right side of the chamber; turn the advance knob to find a film slit. Guide your film into the slit and turn the advancing knob to make sure your film is firmly wrapped around the spool.
- Line up and close the back door securely. Turn your film until the next white dot in the film-stopping reference window appears.
- Start getting excited because you are ready to start shooting with your Sprocket Rocket!
2. Camera settings
Now the film is loaded and ready to go. But wait! Before you start snapping there's a few settings you may have to tweak!
- Shutter Setting
Sitting proudly on the top of the lens is your shutter setting lever. N - 1/100 is for daytime snapshots and when you've connected a flash. B (Bulb)- Use 'Bulb' for unlimited indoor and nighttime long exposures. - Aperture Setting
Tucked neatly under the lens is your aperture setting with two small pictures. Cloudy = f/10.8 - Remember to use this setting when indoors or when dealing with difficult lighting situations. Sunny = f/16 – Use this one when the light is good and the sun is shining! - Focusing
The setting can be changed by simply twisting the lens between the two symbols. 0.6-1m – This is for when you are shooting close objects, such as portraits, flowers, pets, food etc. 1m to infinity – This can be used for normal shots such as landscape/cityscape, group shots etc.
3. Rewinding the film
When you are unable to turn the winding knob any further (be careful not to force it!), you have reached the end of the film! A standard film of 35mm, which normally yields 36 exposures, will produce 18 super-wide angle shots on the Sprocket Rocket. Turn the rewinding knob in the direction of the arrow to rewind your film. When the knob suddenly feels very loose and the tension is no longer there it means your film has been completely rewound. Remove the cameras backdoor, lift up the rewinding knob, and replace the exposed film with a fresh new roll of film! Now develop your film and marvel at your inspired creations!
4. Developing the film
Please keep in mind that your Sprocket Rocket is no ordinary camera and uses a special format which allows wide panorama and visible sprockets. Consult your lab before developing to ensure that they take special care with your extra-special images.
5. Using flash
The Sprocket Rocket (being a liberal and welcoming fellow) allows you to connect any flash with a hot-shoe adapter. For those who aren't sure, that's the cute little slot on the top of the camera. You can find our own flash devices in Lomography Gallery Stores around the world and in our online shop. Please note that most flashes only work on short range, this may be between 1-2m (depending on your flash), so go on, and get right in close!
7. Scanning
So you've just taken your very first roll of film with the Sprocket Rocket, you've got your breathtaking negatives, so now what? After getting their shots developed, many Lomographers decide that they want to scan their precious negatives themselves, but why?
- The Sprocket Rocket's unique sprocket-hole exposures and super-wide panoramas might not be able to be scanned by some ordinary labs.
- With your own scanner you have maximum control over color, tone, saturation and resolution of your images.
- Because you can save a lot of money! Scanning can get expensive and so a good scanner is a fantastic investment that you'll never regret. Get one and start saving those pennies!
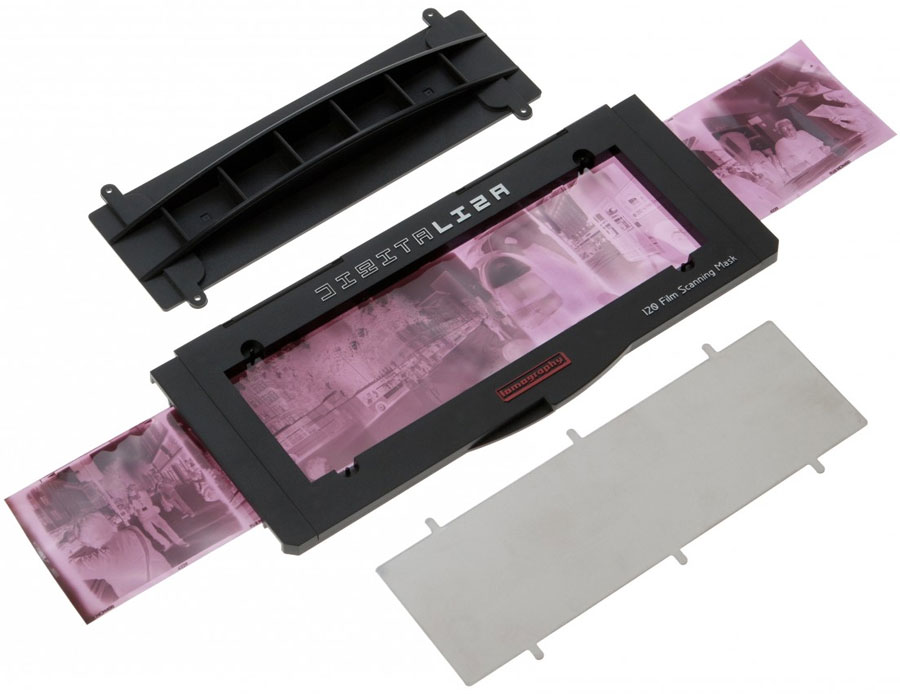
DigitalLIZA masks are specifically designed for scanning Lomography formats such as sprocket-hole exposures and wide panoramas, which makes it the perfect accompaniment to the Sprocket Rocket.
Scanning your own negatives is a rewarding process and gives you ultimate control over your images. After all, they're your babies, so why not have them exactly how you want them? All you need to scan your images is a good scanner and you're ready to go! It's that simple!
For more information on DigitalLIZA, see microsites.lomography.com/digitaliza
For more information about scanning, see how-to-scan.com