라이트페인팅
Lomography 라이트 페인팅 가이드
라이트페인팅이란?
Light painting is when you control the light that enters the camera’s lens and use it to "paint" something on the photograph. It’s usually done in low-light situations and is a great way to create unique photographs which explore the endless possibilities of photography. There are an infinite number of ways to light paint, beginning with your source of light and ending with what you draw!
촬영방법
#1
라이트 페인팅은 아주 어두운 새까만 곳에서 더욱 깨끗하게 촬영할 수 있습니다. 주변이 어두워지는 것을 기다리거나 어두운 방에 가서 찍어보세요.
#2
카메라를 삼각대 (또는 카메라가 움직이지 않는 곳) 에 고정합시다. 그리고 라이트 페인팅 촬영 중에 누군가가 카메라를 건드리는 일이 없도록 주의합니다.
#3
Set your camera to the B shutter setting. This allows for a long exposure. It means that the shutter will stay open for a longer time so that more light will enter the lens.
#4
Grab your light source, hit the shutter release, and start getting creative. Try using a sparkler to see sparks fly!
#5
If you want to write a message on your picture, remember to do it backwards if you want it to be legible after processing. Alternately, just draw something, wiggle around or trace something — experiment!
#6
이처럼 새롭게 배운 테크닉, 라이트 페인팅을 많이 시도해보고 익숙해져서 당신의 사진기술을 한단계 업그레이드 하세요!
Equipment
-

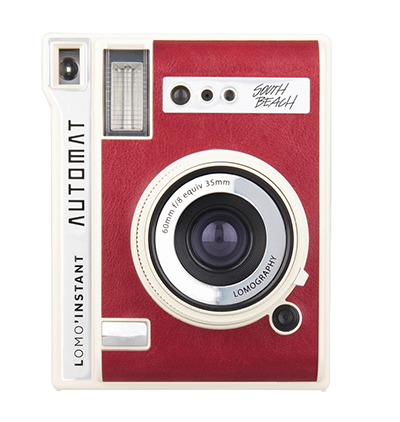
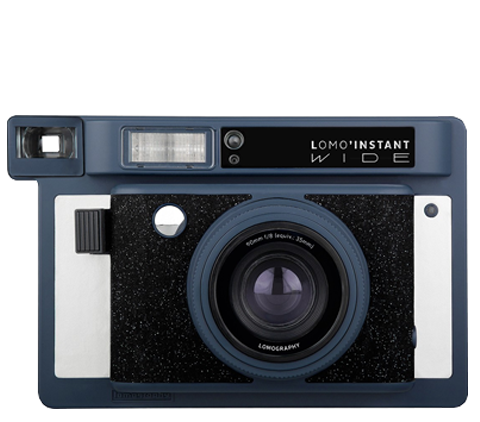
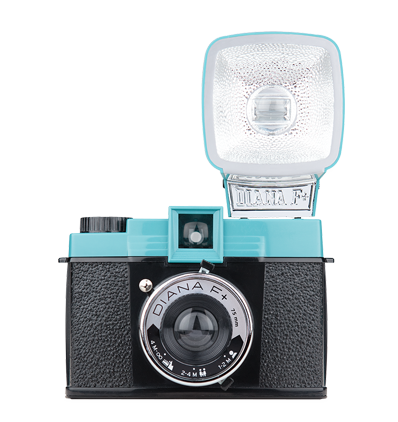
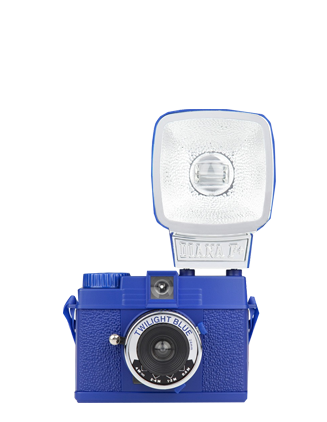
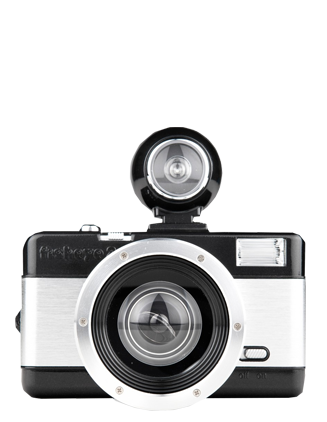
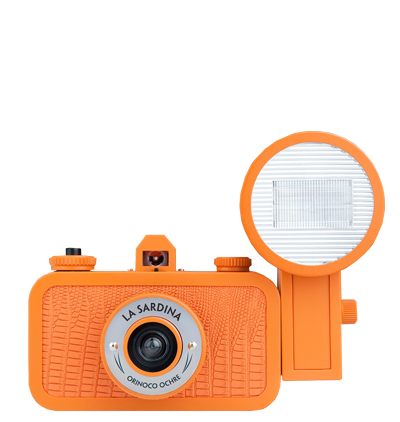
A Camera
You’ll need a camera with a Bulb Mode function. Any of these cameras will work!
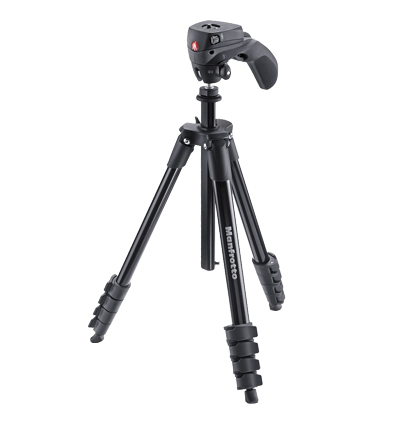
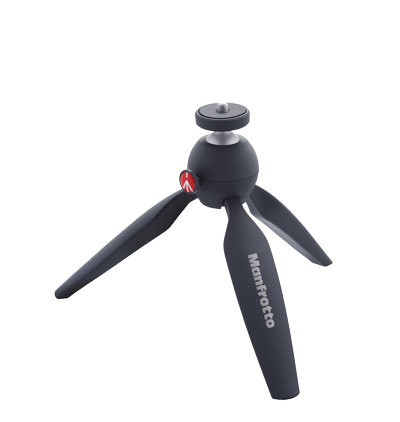
-

You can also just use a super flat and solid surface like a table top, but for adventures further afield, you’ll need a tripod. One of these will do the trick!
-

A Light Source
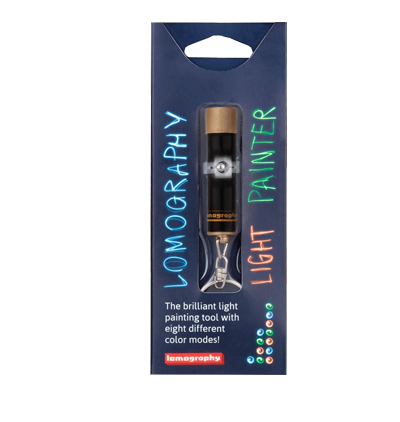
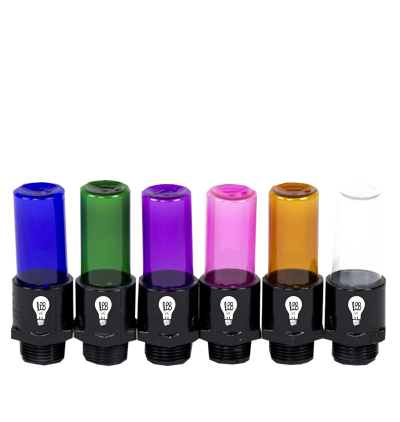
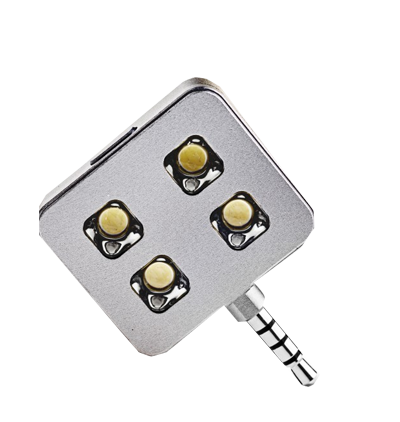
Anything that emits light will work — a torch, a glow stick, a sparkler, and so on. There are tons of special light painting tools that you could use, too! These are purpose-built and have awesome features that create super cool effects. Check them out!


촬영 팁
Use your surroundings to paint for you
If you’re in the city at night, set up your camera and take a long exposure of the light trails cars leave as they drive past. At a carnival or amusement park let a spinning ferris wheel do the painting for you.
Play with multiple exposures
Take a picture of your cat, a flower, a car, whatever; then light paint a cat, flower, car on top of the initial image for a crazy effect! The possibilities are endless!
Star Trails
Set up an ultra-long exposure, position your camera on a tripod, point it up at a clear night sky and see the path that the stars make once your image is developed. Read more about star-trail photography in this article by blueskyandhardrock.
라이트 페인팅을 하고 있는 동안 주의해야 할 것은?
이 기술은 누구나 쉽게 할 수 있습니다. 그러나 제대로 신경써야 할 것 들을 확인해 주세요!
제대로 신경써야 할 것들을 읽기 & rarr;Steel Wool 라이트 페인팅 가이드
Here’s to the bold and the brave: something to try if you’re feeling mischievous with light painting.
Read more →Commitment to Sparkle Motion: Sparkler Portraits and Light Painting
어떻게하면 탁탁 하고 타오르는 스파클을 찍을 수 있는지, 그 트릭은 이쪽으로
자세히보기 & rarr;Light Painting: Dancing in the Dark
매우 크리에이티브한 라이트 페인팅의 예제! 댄스를 주제로 촬영해 본 페이지 입니다.
자세히보기 & rarr ;
Q&A
노출시간은 어느정도가 좋나요?
This depends on what you are trying to capture. If you are drawing something, just leave your shutter open for as long as you are painting for. If you want to capture a night scene with moving objects, you should be safe with a 5-10 second exposure (depending on the speed that the light source is moving at). But these are just guidelines — experiment and find out what works best for you!
How will I know if I'm standing inside the frame properly?
Try and take a look through your viewfinder. If you are in the dark then illuminate the scene so you can see, then try and mark how far you can go vertically and horizontally so that you’ll remain inside your frame when the photo is taken.
좌우 반전 문자를 쓰려면 어떻게 해야 하나요?
This can definitely be tricky! But some letters such as T,I,O,M,H,Y,U,W,X,V & A are disaffected by this mirror writing rule, so if you don’t want to bother with writing backwards just fiddle about with those letters. If you do want to use the rest of the alphabet or want to draw an image, just imagine you are looking at it in a mirror and write it that way.
B셔터 (벌브모드) 가 없는 카메라 입니다. 어떻게 해야 하나요?
당신의 카메라가 수동 셔터 라면, 당신의 친구에게 셔터를 눌러달라고 부탁한 후, 그 사이에 당신이 라이트 페인팅을 합니다.
어느 타이밍에 사진에 찍히게끔 들어가는게 좋나요?
어둠속에서 촬영을 한다면, 무언가가 빛나기 시작하기 전까지는 움직임이 비치지 않습니다.
어느정도의 ISO감도를 가진 필름을 사용하는 것이 좋나요?
Lomography에 대하여
Lomography is a Magazine, Shop and Community dedicated to analogue photography.
It all began with a fateful encounter in the early 1990s, when two students in Vienna, Austria, stumbled upon the Lomo Kompakt Automat — a small, enigmatic Russian camera. Mindlessly taking shots from the hip, and sometimes looking through the viewfinder, they were astounded by the mind-blowing photos it produced — the colors were vibrant, with deep saturation and vignettes that framed the shot — it was nothing like they had seen before!
귀국하자마자 많은 친구들이 사진을 보고 자신만의 LOMO LC-A를 구매하기 시작했습니다. 이렇게 예술적인 사진에 새로운 스타일이 도화선이 되어, 여러분이 아시는 Lomography가 태어났습니다!
용어 사전
노출시간
렌즈가 열려있는 시간입니다.
셔터 스피드
셔터가 움직이는 속도입니다. 노출시간 (셔터를 열어 둔 채로있는 시간) 과 밀접하게 관련되어 있습니다.
셔터 릴리즈
사진을 찍을 때 누르는 버튼입니다!
벌브모드
렌즈가 열리는 크기를 나타냅니다. 렌즈의 구경은 F값이라는 말로도 표현합니다. 렌즈가 크게 열려있는 상태에서는 F값은 작은 숫자 (F.2, F.4 등)으로 표시됩니다. 반대로 렌즈 구경이 작을수록 F값은 커집니다. (F.16, F.20 등) 만약 사진에 빛을 많이 담으려면, 구경이 큰 것 (F 값이 작은 것) 을 사용합니다. 반대로 빛을 많이 담지 않으려면, 구경이 작은 것 (F 값이 큰 것) 을 사용합니다.
뷰파인더
The B stands for " Bulb ". The B setting allows you to manually hold the shutter open and this gives you full freedom over how long you want to expose your photo for. Some Lomography cameras which have a B setting are the La Sardina, Fisheye No.2, Sprocket Rocket, Belair Cameras, Lubitel 166+, Diana F+ and Diana Mini.
렌즈 구경
촬영할 때에 촬영되는 범위를 확인하기 위해 들여다보는 창문 같은 것 입니다.
Share Your Light Paintings
Join the Lomography Community to share your light paintings with millions of creatives all over the world! There are tons of artistic light paintings on our Community page, too, so it’s the perfect place to go for inspiration. Comment on your favorites to ask for tips from your fellow Lomographers!
Don’t forget to show your friends your new light painting skills on social media, too. Use the hashtags #mylomo #lomography to connect with other Lomographers on Facebook, Instagram and Twitter.